Hero camper recently announced their new Nested Drawer — it’s a small drawer that gets mounted above the cooler and holds the gas hob parts safely.
Which is pretty genius; the pan support is cast iron and quite heavy. Having all parts for the gas hob safely stored and easily available is a win 🎉
It was straightforward to install, but needed a little modification to improve the stability of the gas hob parts. Getting the cooler back in and connected afterwards was a bit of a challenge.
Table of contents
Getting the cooler out
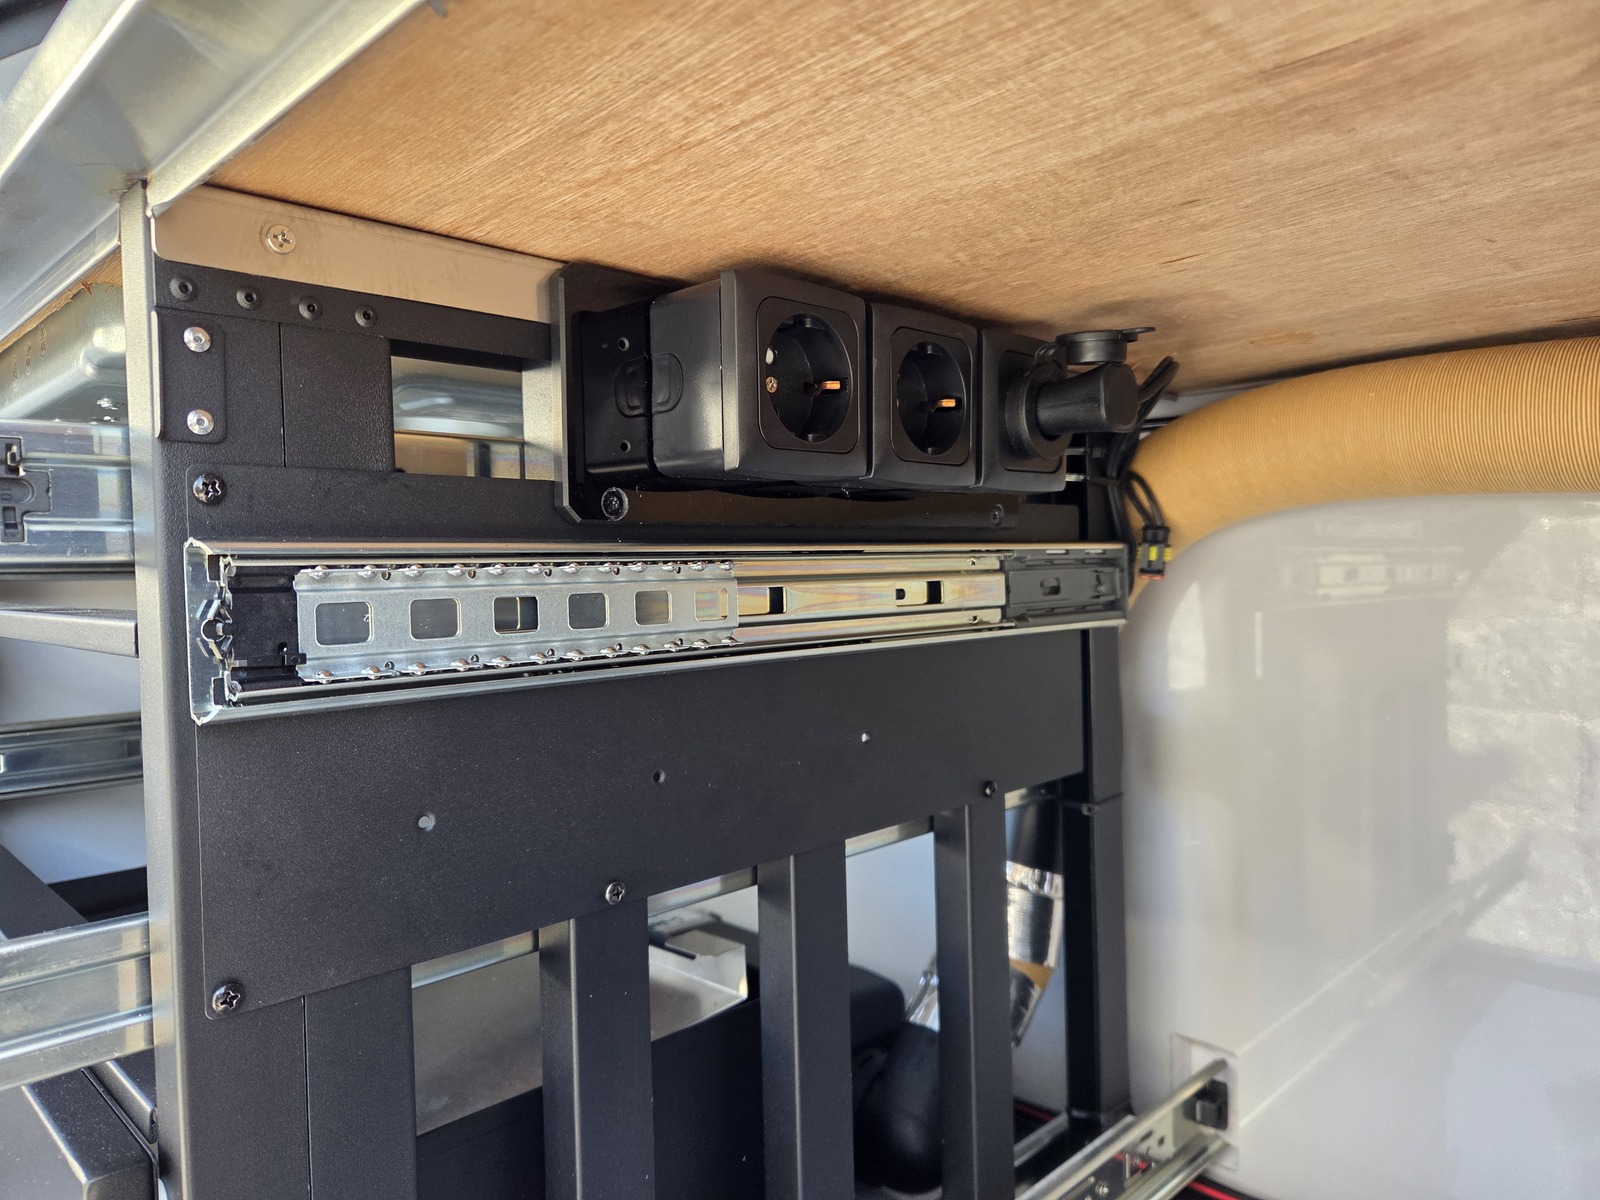
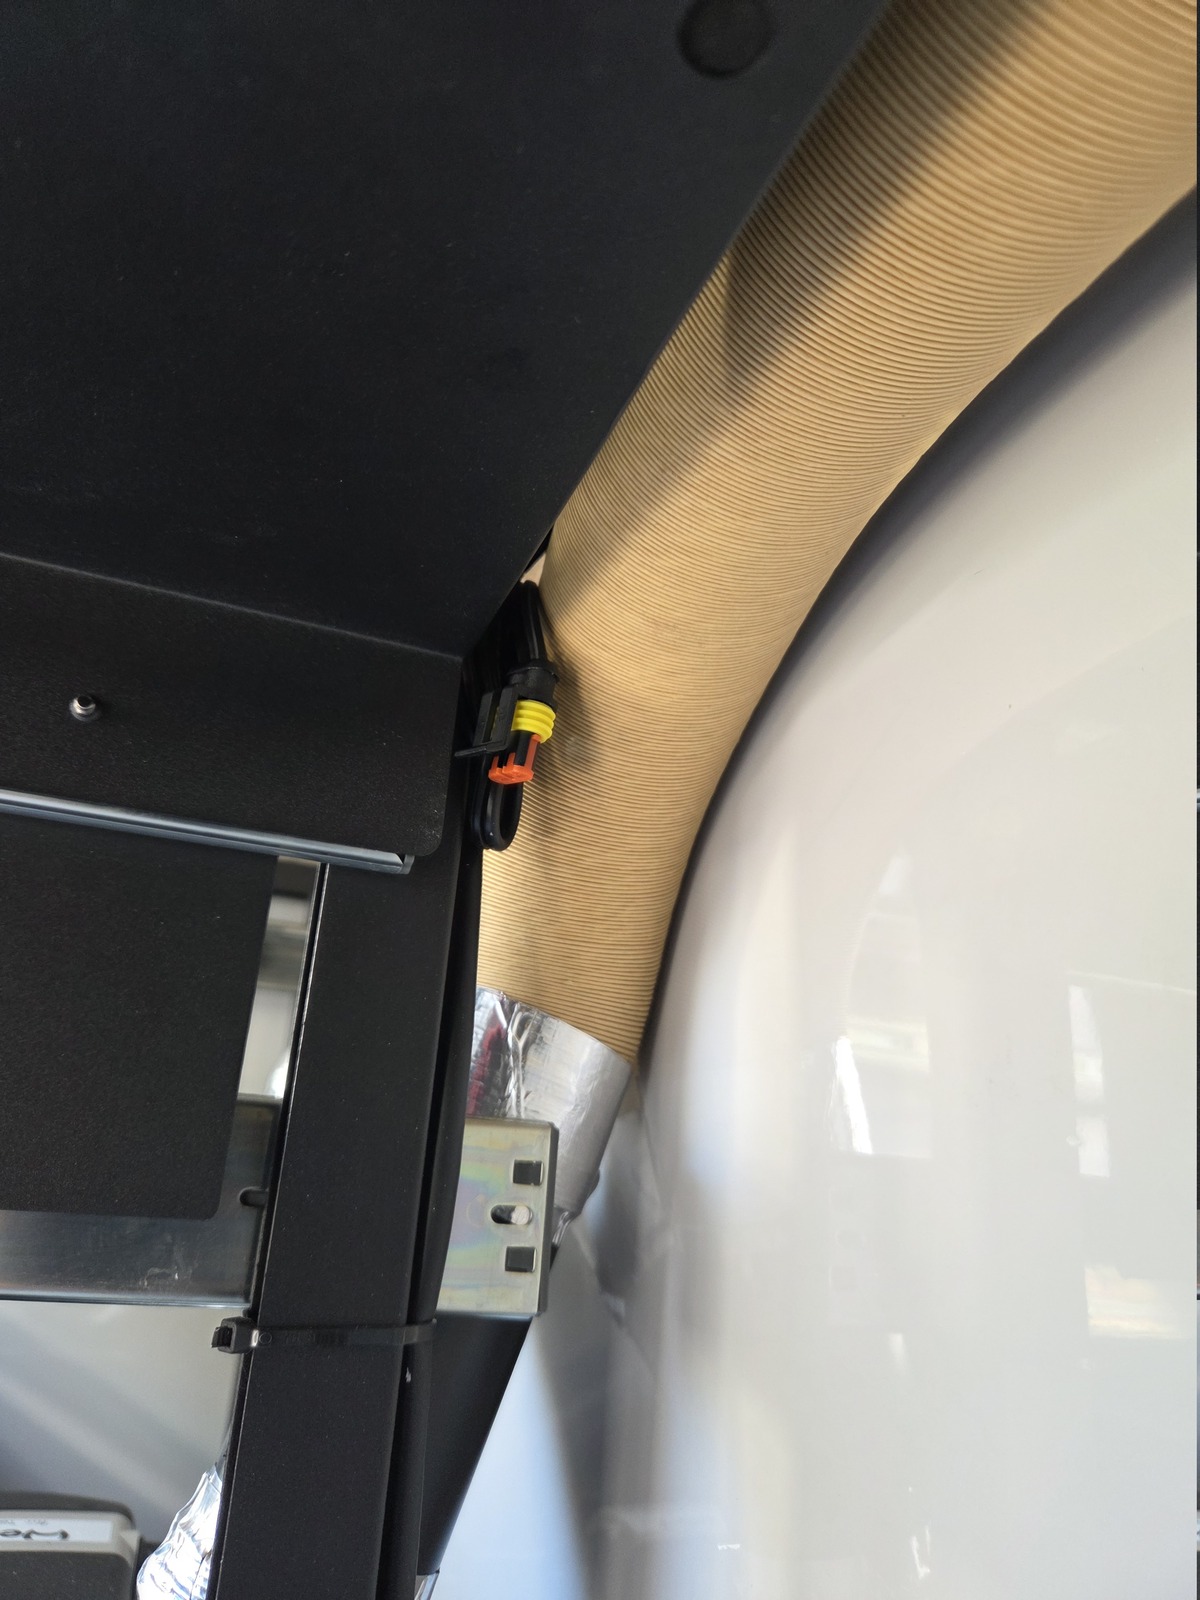
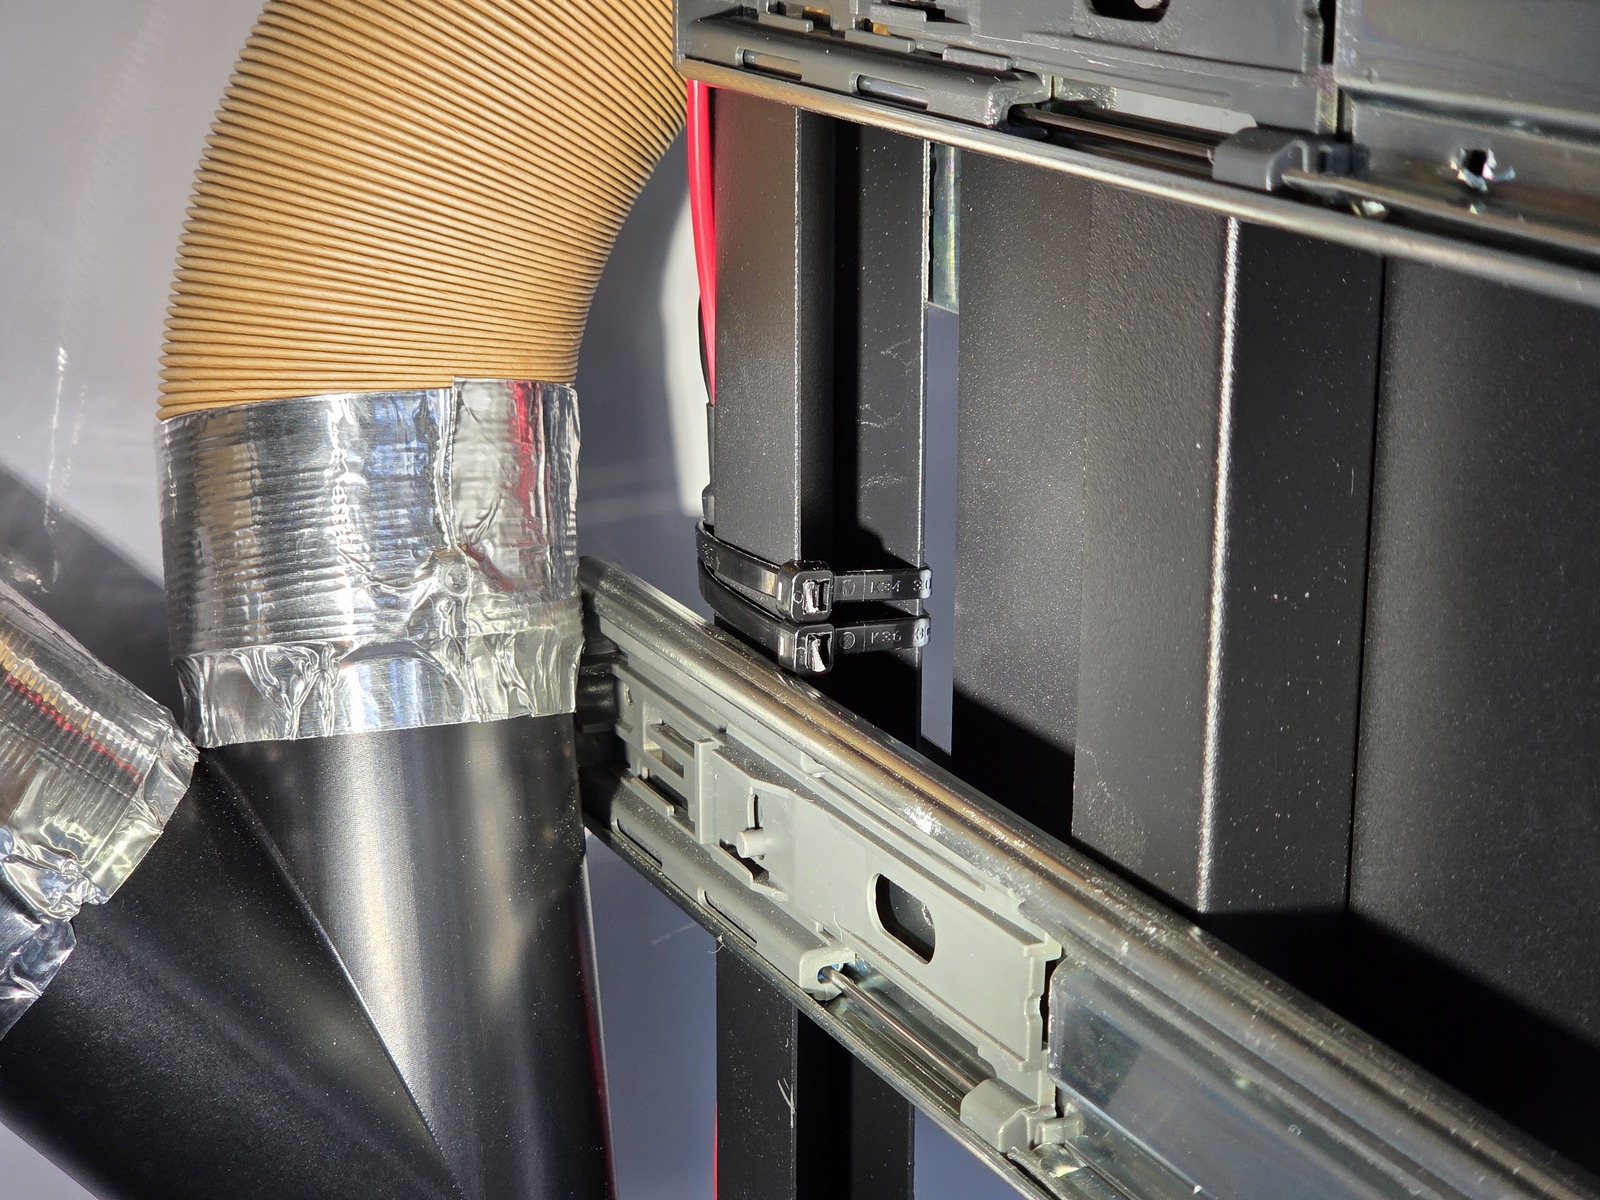
First things first: the cooler needs to come out. To do that it needs to be disconnected. The coiled cable is zip-tied at the very back, next to the power outlets. There is a plug between the coiled cable and the 12V power outlet plug.
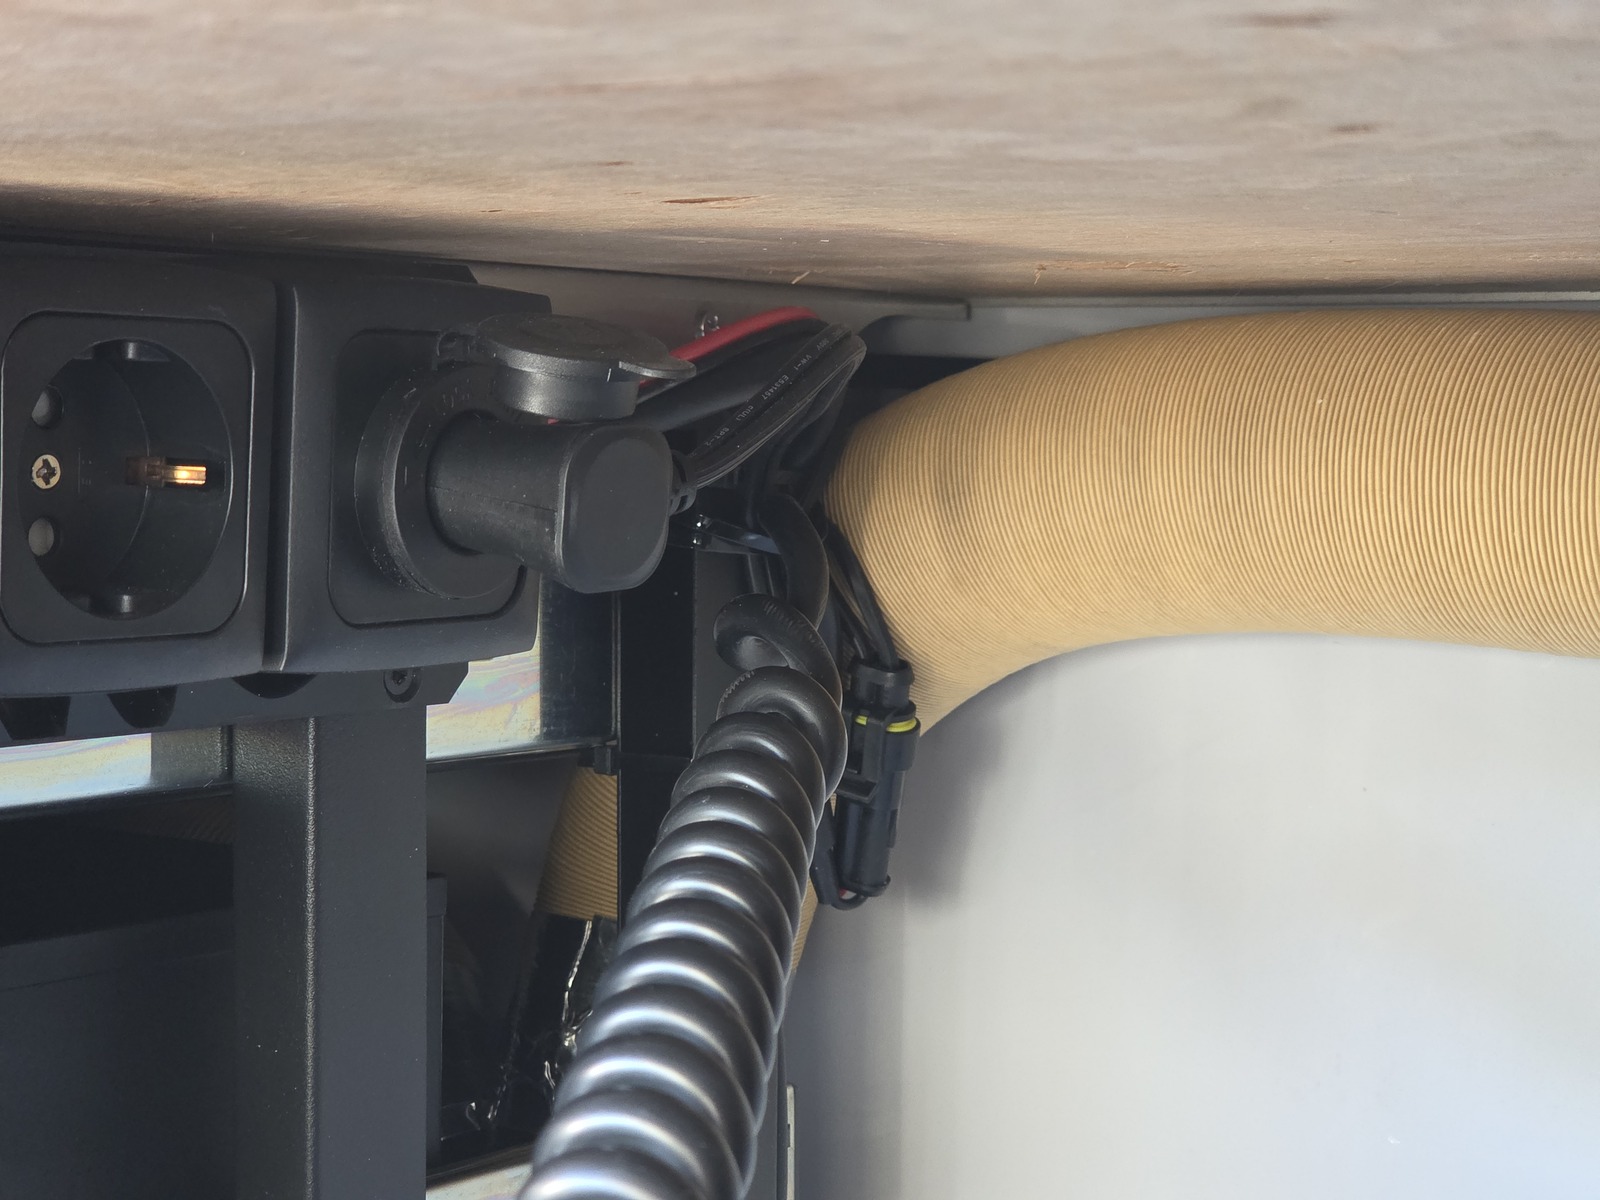
To gain access I also took out the two topmost drawers on the left. That gave me enough space to reach and disconnect the plug, and cut the zip ties holding the coiled cable.
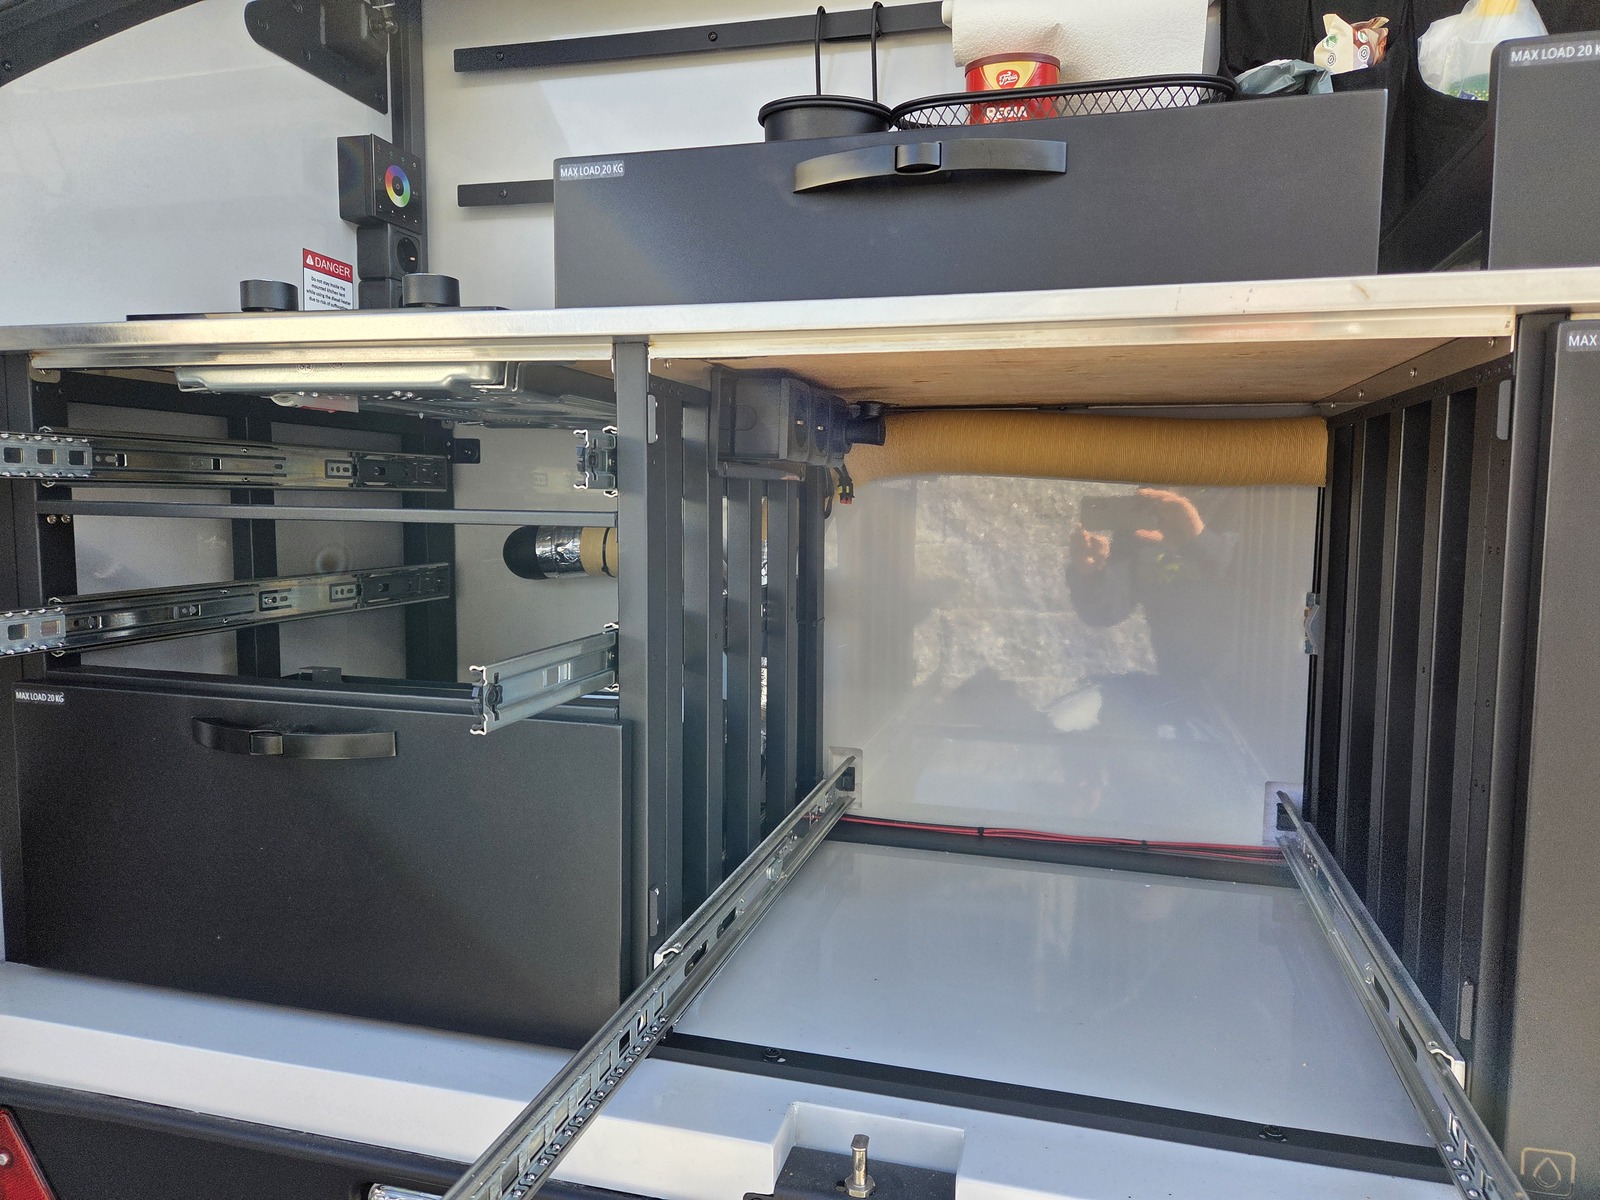
I could now release the cooler drawer and pull it all the way out.
With the cooler out of the way, and some space to work, it was time to start the installation.
Mounting the rails and drawer
There are pre-drilled and threaded holes for the rails, and the assembly came with screws. So this part was very easy. The two bottom screws on the power plate had to be removed, the rail slid under, and some longer screws (also came with the assembly) installed.
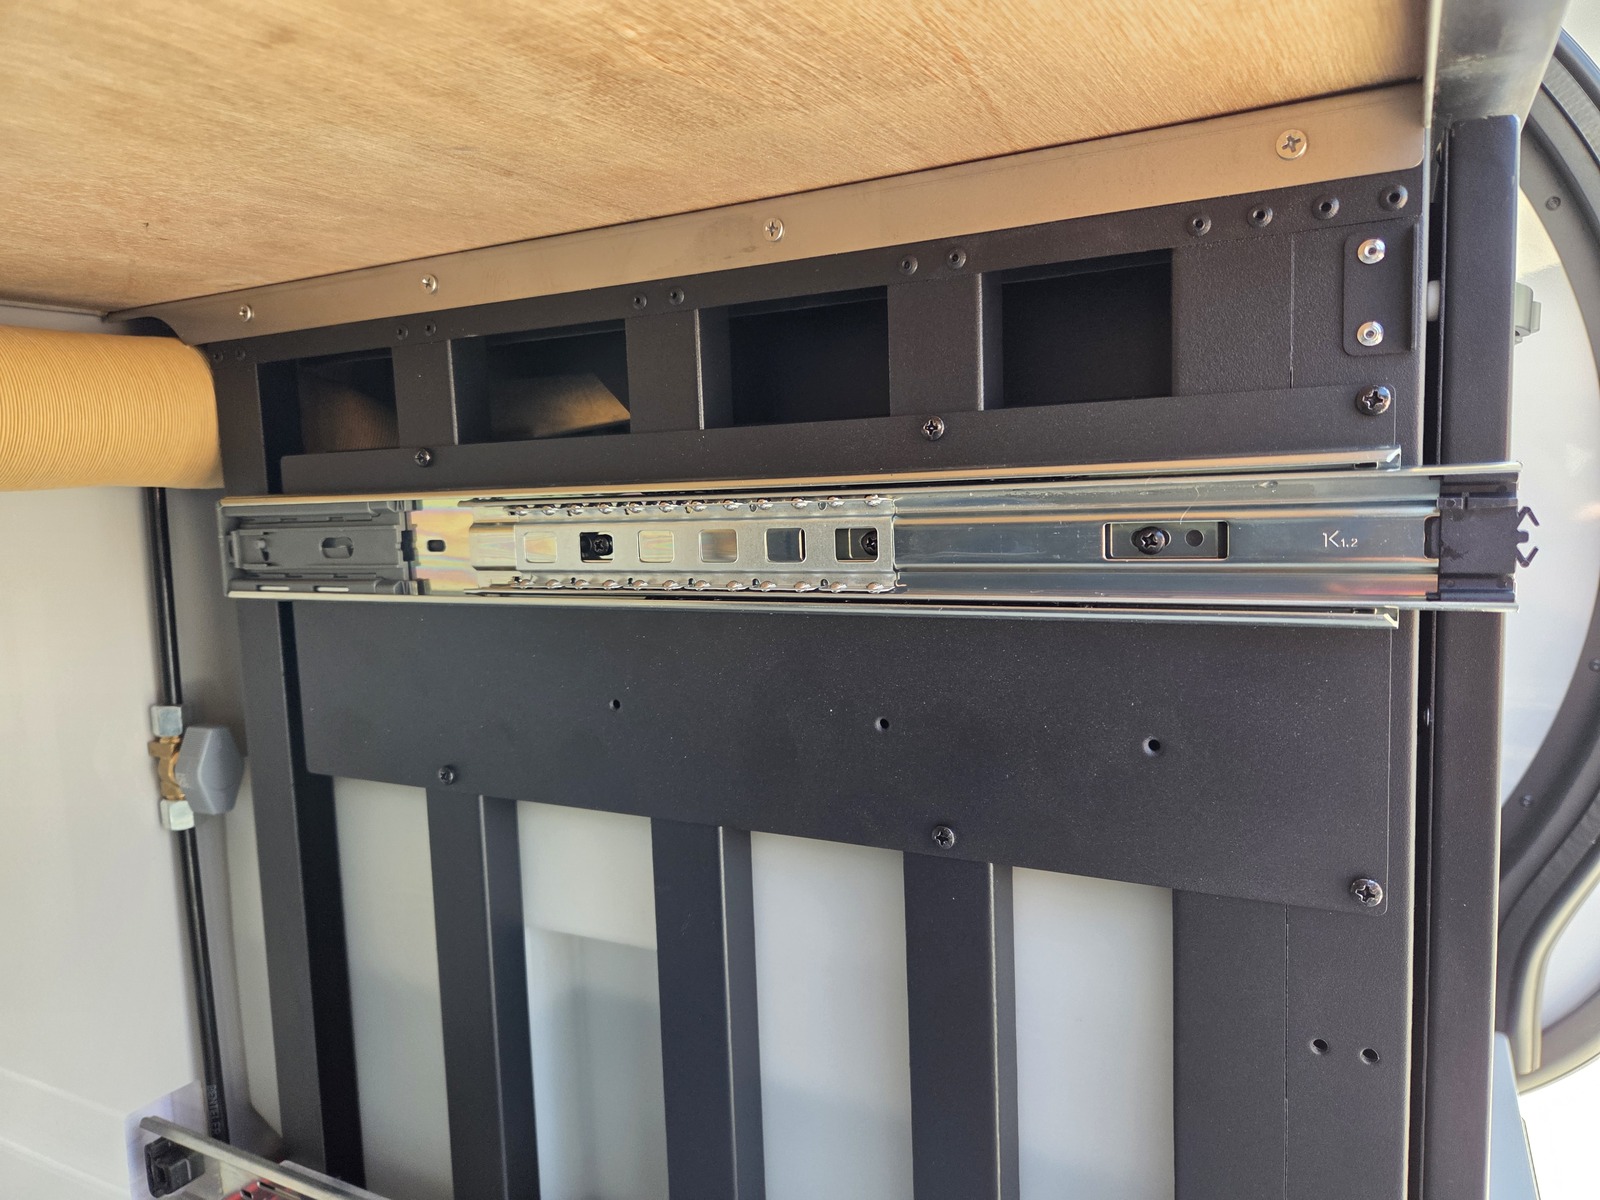
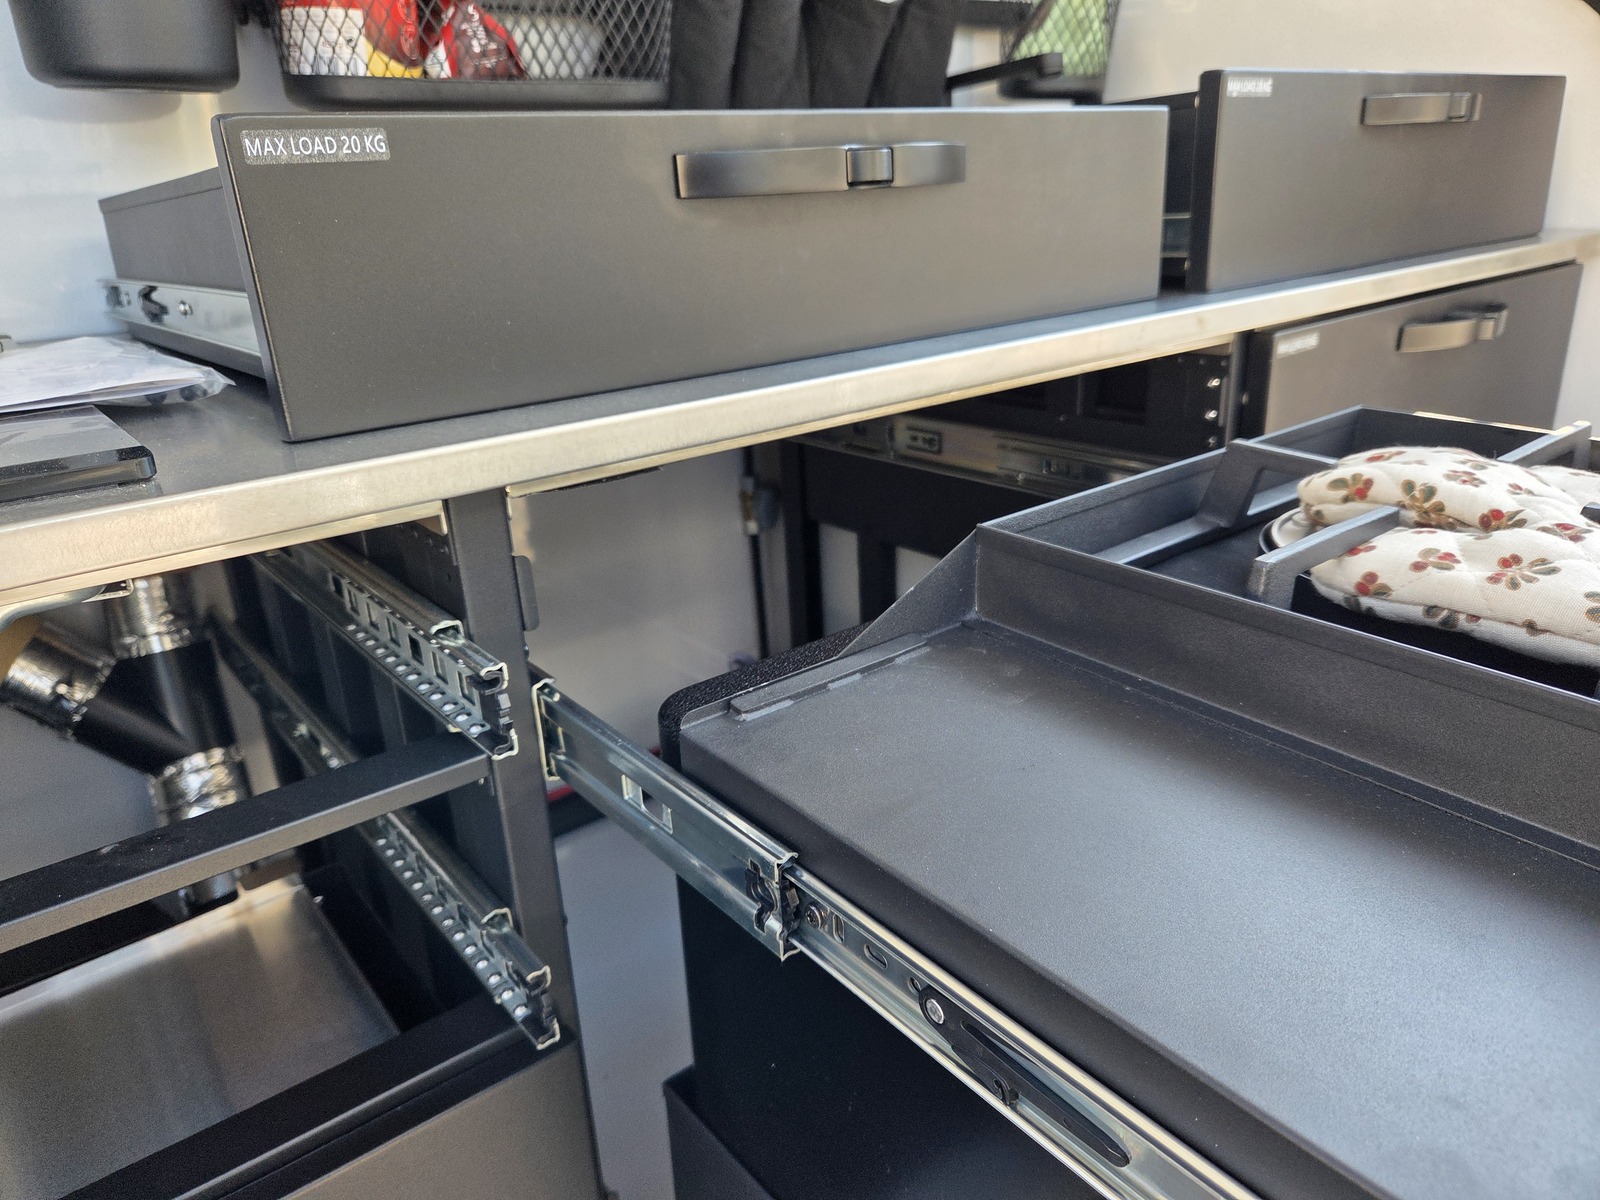
The drawer could now be inserted into the rails — and voilà; a drawer!
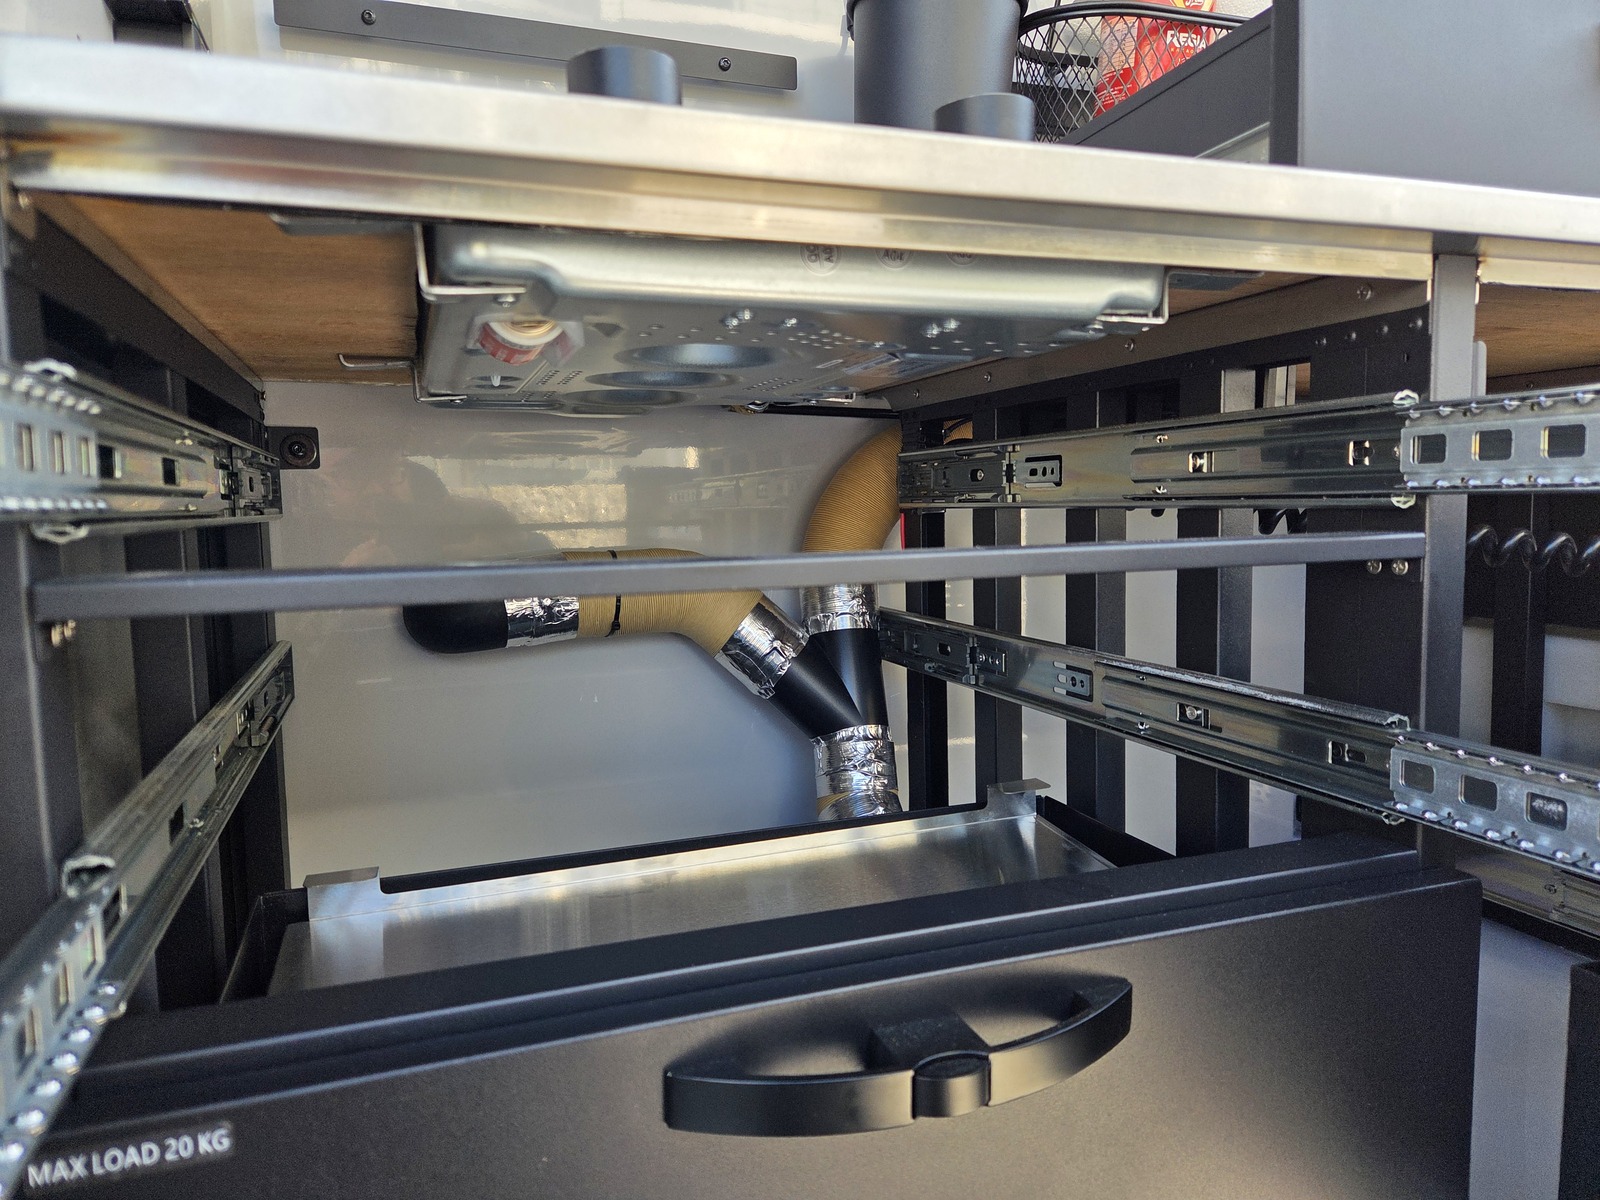
It’s pretty tight behind the drawer, but it’s not hitting the heating ducts or any wiring.
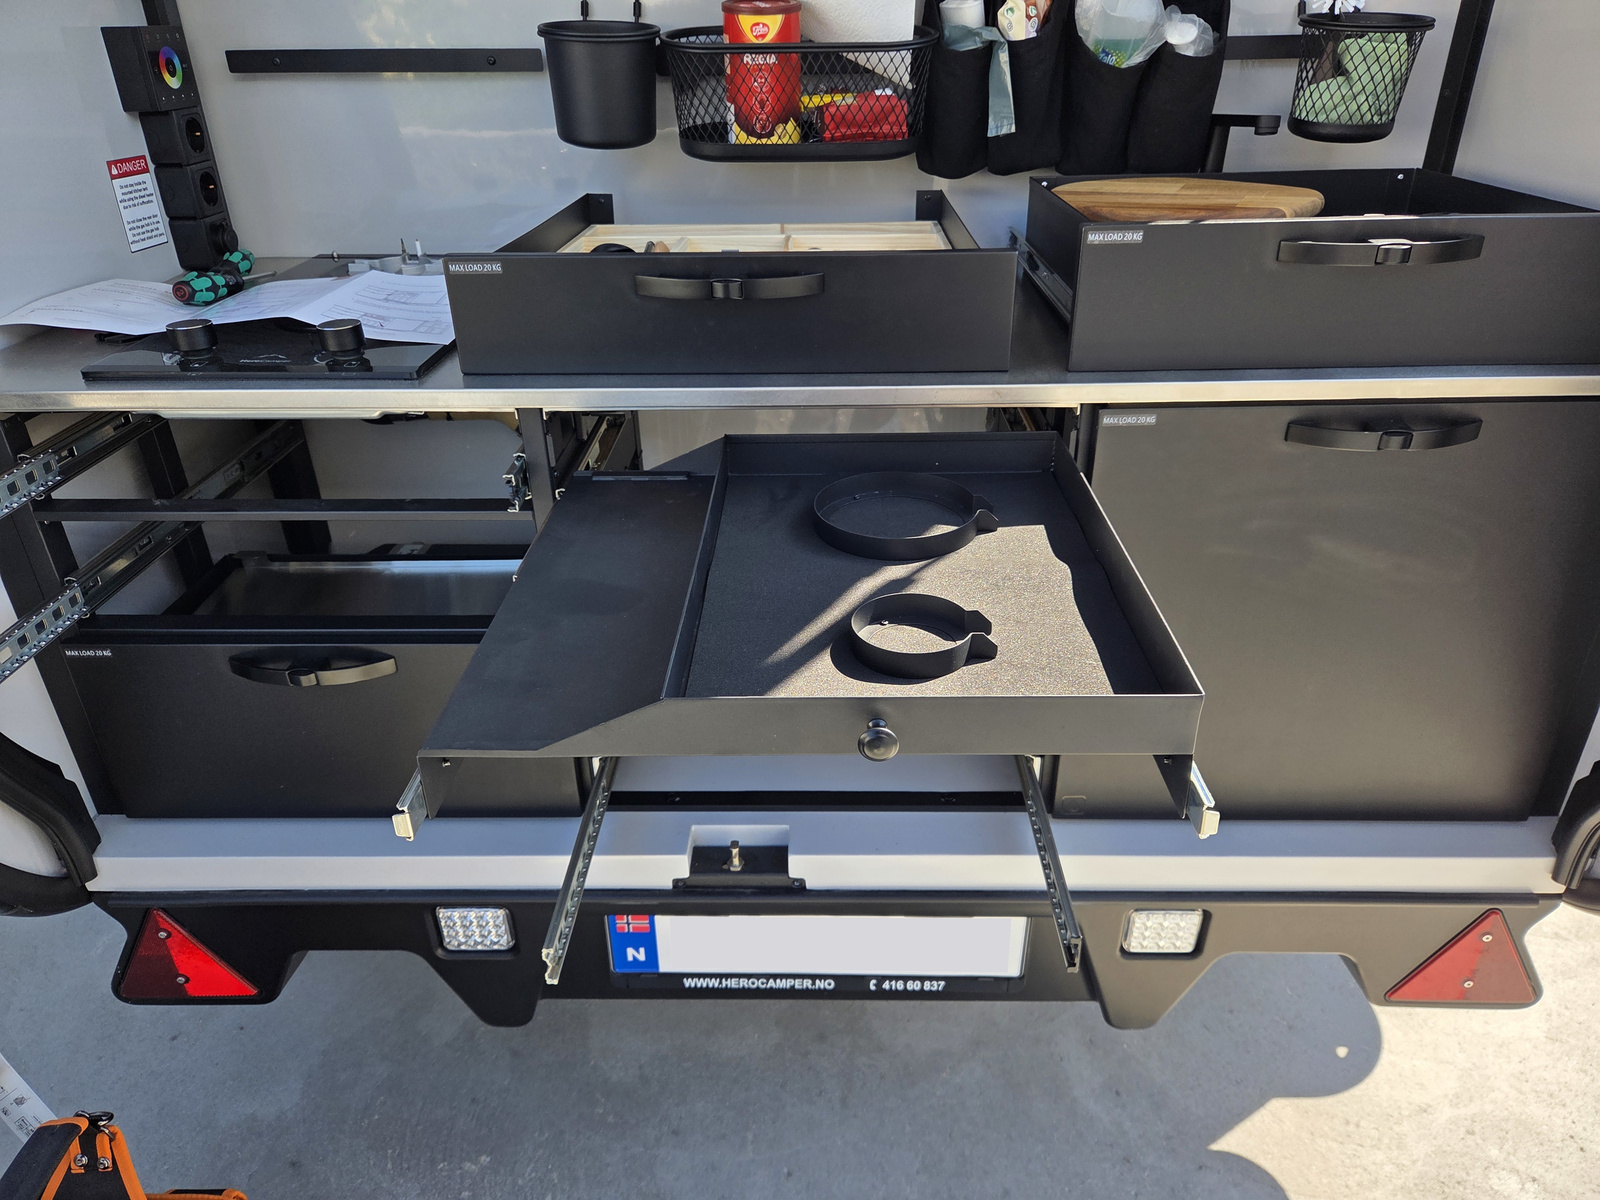
Securing the burner parts
Looking at the brackets to hold the burner parts, I noticed three screws securing them to the drawer itself. The burner parts would rest directly on these screws… Seems like a bad idea; resting a metal part on three metal screws with all the bumps and movement the camper will experience.
I measured the screw height at 1.68 mm, then found some adhesive rubber pads that was 2.65 mm high. Giving ~1 mm clearance between the burner parts and screws.
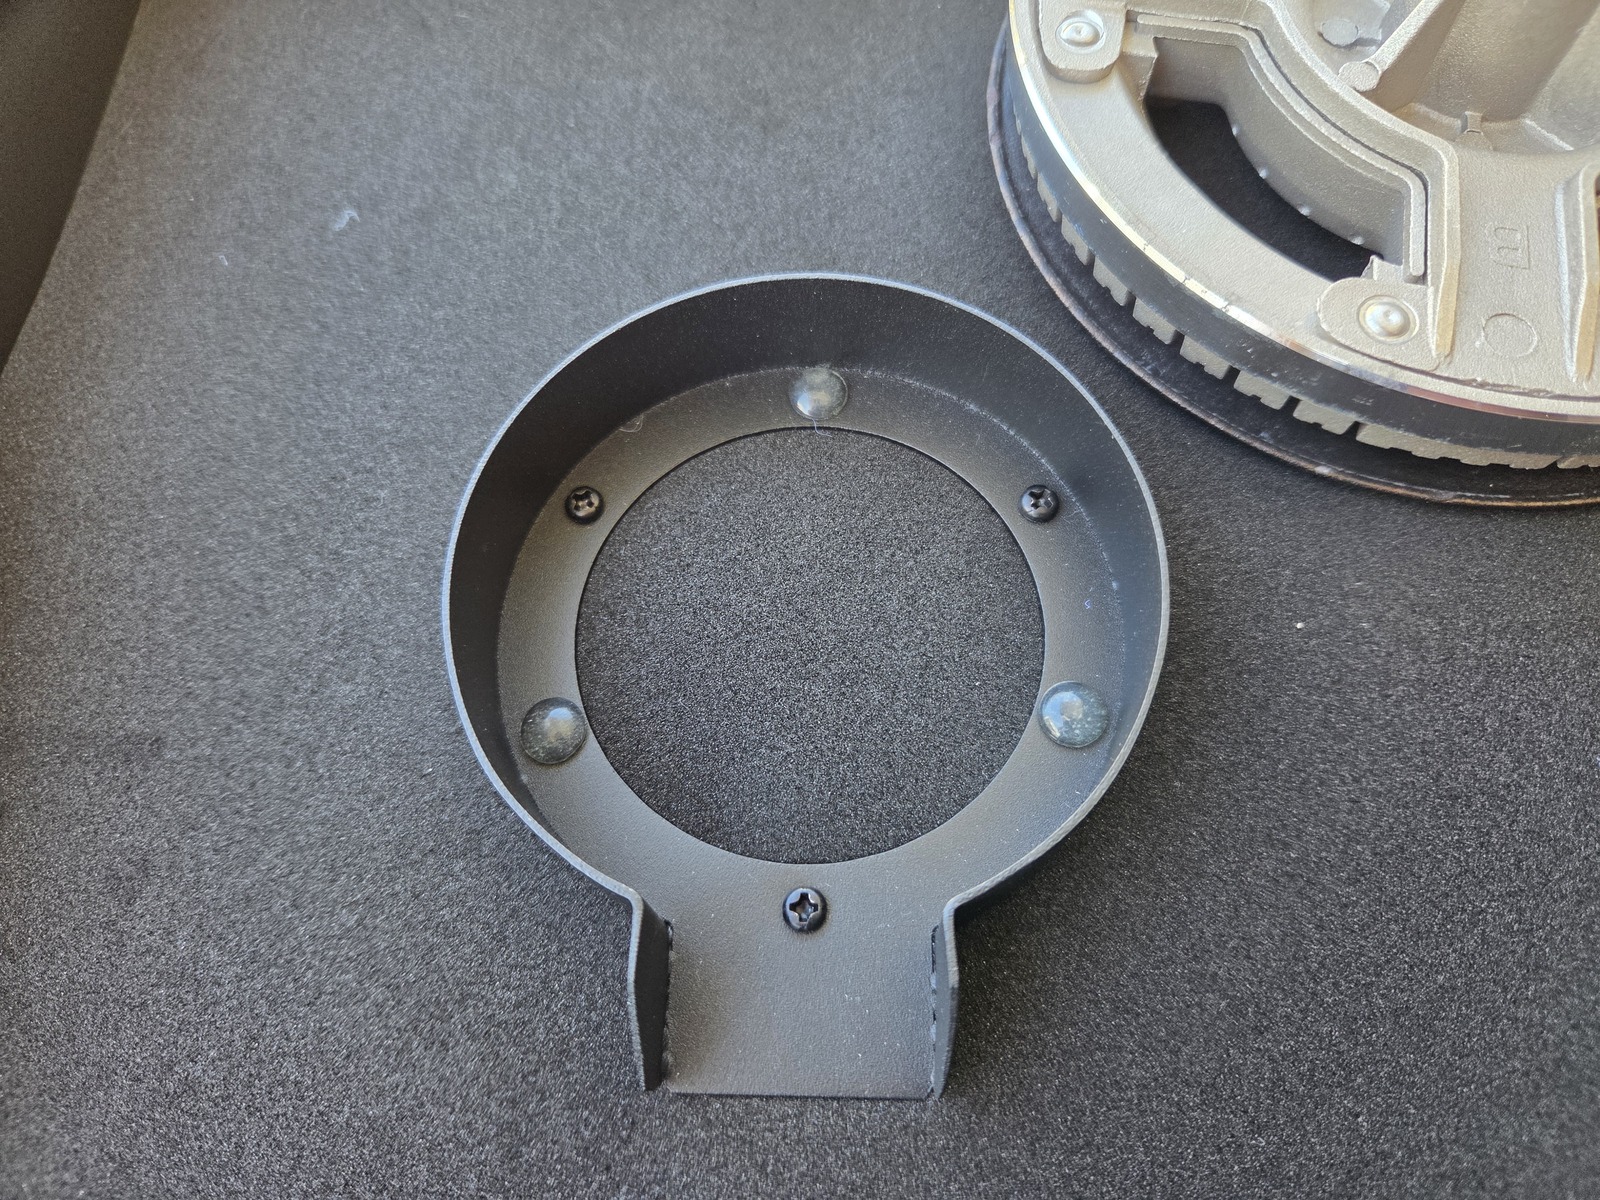
This helped a lot! And the small burner was now secure with no metal on metal contact.
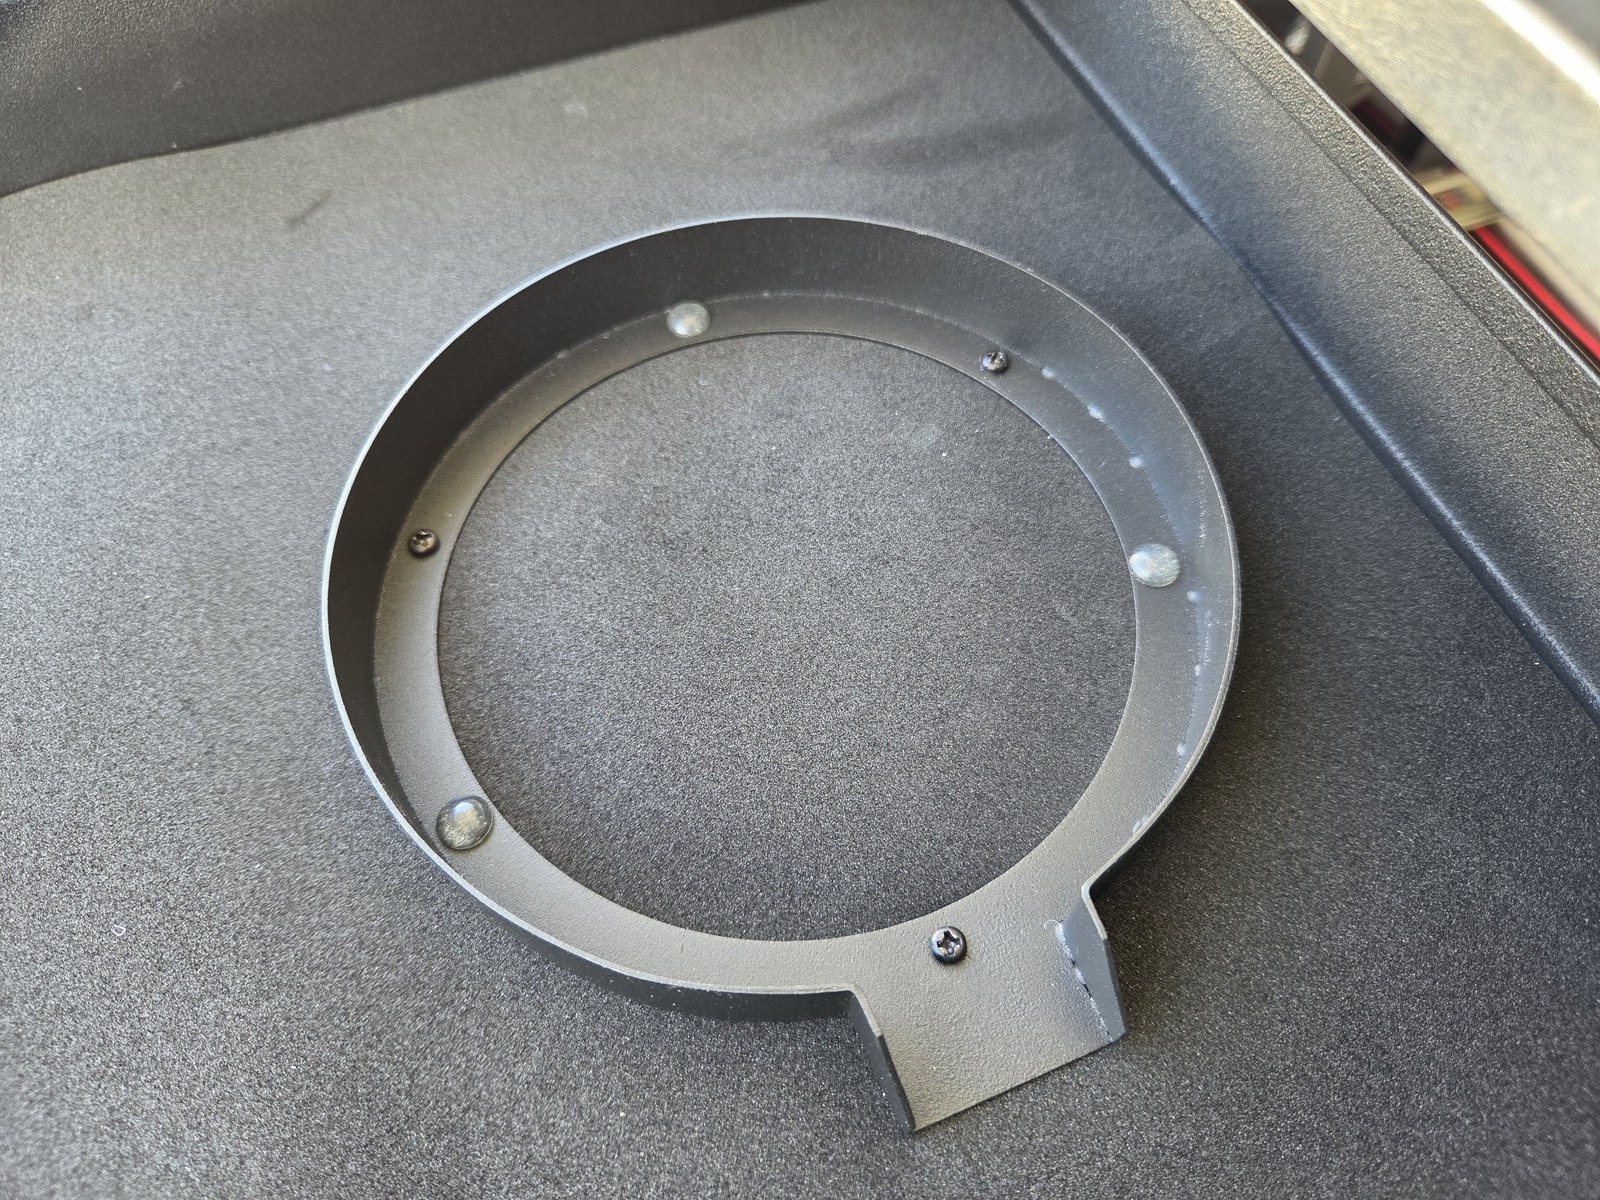
But the large burner wasn’t quite there yet; I found that with the center piece in place — it was too high to sit comfortably in the bracket.
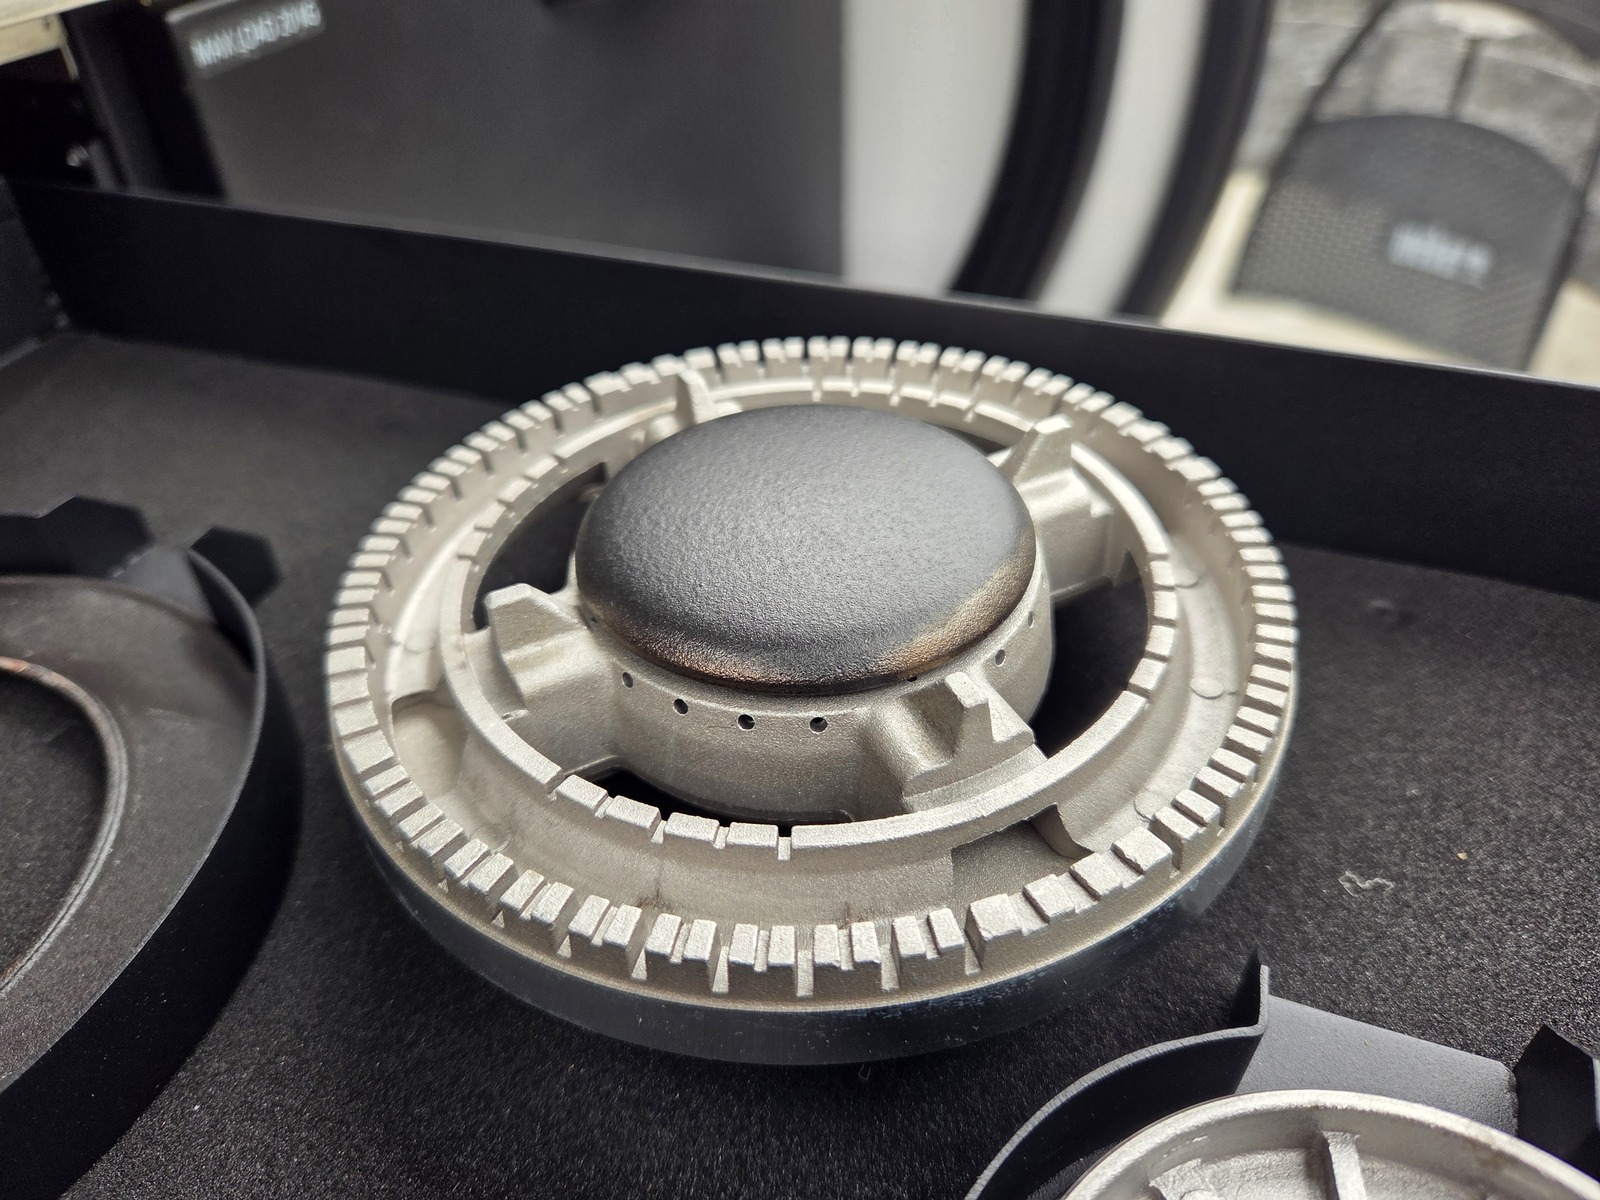
We decided to remove the center piece, and store it somewhere else. With the center piece removed there was no wobble, and the burner sat firmly in the bracket.
To “lock” everything in place, we placed some potholders and an oven mitt on top of the burner parts before placing the heavy pan support.

It feels quite solid now, and doesn’t wobble at all. But the true test is when we are back on the road 😎
Getting the cooler back in
Okay, drawer installed, now just to get the cooler back in and hooked up — and this turned out to be the challenging part.
The newly installed drawer rails were now blocking the access I had from the left side. And the new drawer reduced the space above the cooler, where my arm needed to go.
Even with access blocked I managed to get the plug re-connected using just one hand. I needed two hands to get it disconnected, so I’m hoping I don’t have to do that again anytime soon.
I zip-tied the coiled cable in the same location it was previously. But now the cooler drawer wouldn’t close all the way, we could hear the coiled cable hitting something at the back when the drawer was almost closed.
Using my phone to record I found that the coiled cable was interfering with both the new drawer and the heating duct. Getting caught between the two.
After some head scratching my wife and I figured that the coiled cable could not be mounted the same place it was prior to the drawer install, it needed to be moved down.
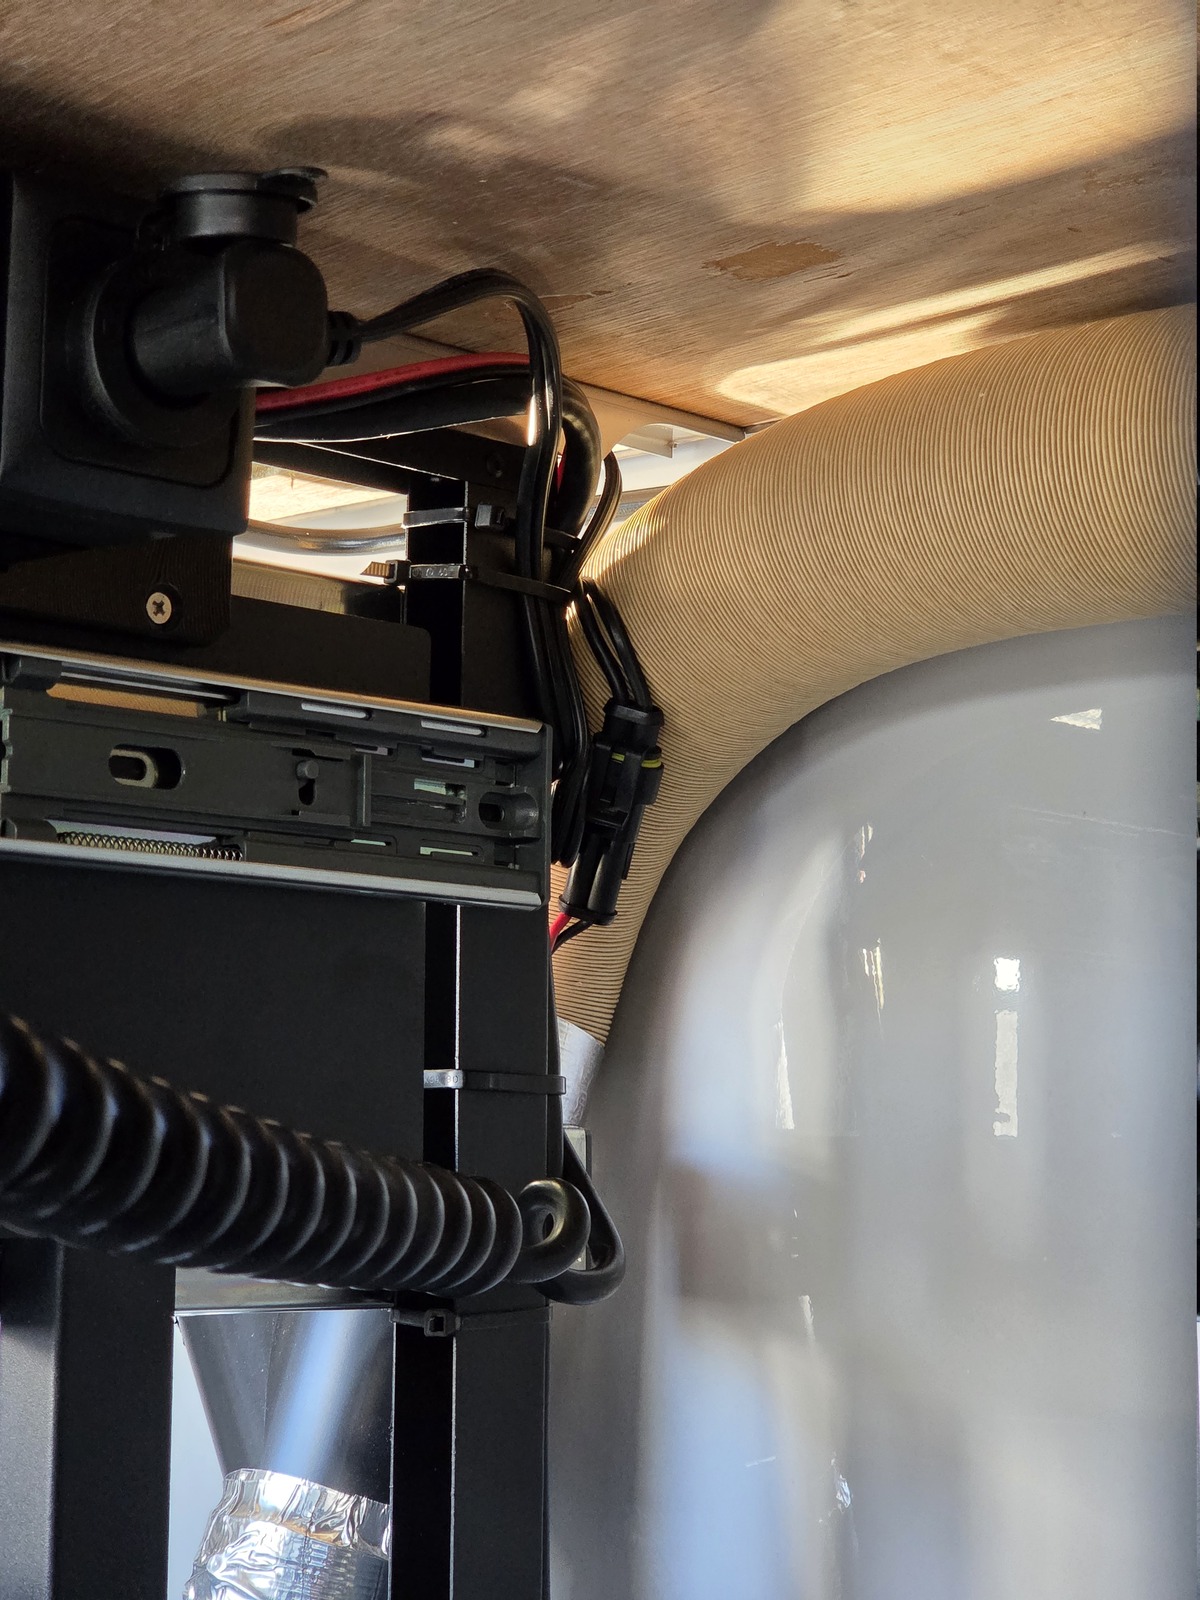
This also moved the plug out of the way, staying clear of the new drawer when it was closed.
Both drawers now close just fine. We can still hear the coiled cable getting sandwiched between the cooler and the back wall when closed, but it was like that before installing the new drawer as well.
That is just how it is designed. Squeezing as much as possible into a limited space just has that effect, it gets tight.
I added another zip tie to secure the coiled cable.
Wrapping it up
So there you have it! The nested drawer is installed — we now have a permanent, dedicated, and secure location for the gas hob parts.
That is one less thing to pack and keep track of. Having it close to the gas hob, and easily accessible is a big win.
The installation itself is straightforward, though getting the cooler reinstalled afterwards was a bit of a puzzle. If you’re doing this yourself, I’d also recommend adding rubber pads right away — it makes a noticeable difference in how secure the parts feel.
The true test will be when we’re back on the road.
🖖